Google just released one of the most highly requested administrative features for Google Analytics 4. You can now filter incoming data based on custom conditions, rather than relying strictly on IP addresses or hostnames.
If your analytics property has been plagued by relentless bot traffic over the last year, this is the exact tool you need. It is the closest feature GA4 has introduced to replace the advanced view-level filters we lost when Universal Analytics was retired.
However, this feature is as dangerous as it is useful.
Here is exactly how the new Custom Condition filter works, the safest workflow to block complex bot traffic without deleting real users, and why this filter can do things that Google Tag Manager cannot.
The Limitation of Previous GA4 Filters
Until today, GA4 only provided two methods for filtering data at the processing level. You could block internal traffic using IP addresses, or you could use the Hostname filter to block traffic from unauthorized domains and staging sites.
Neither of those filters solves the modern bot traffic problem.
Sophisticated bots do not use a single static IP address. They route their traffic through massive residential proxy networks, making IP blocking completely useless. Furthermore, they scrape and send their fake traffic using your actual domain name, meaning the Hostname filter allows them right through the front door.
To block a modern bot attack, you have to look for behavioral footprints. You need the ability to tell GA4 to block traffic when a highly specific combination of dimensions occurs simultaneously.
Enter the Custom Condition Traffic Filter
You can find the new feature by navigating to Admin > Data collection and modification > Data filters. When you click "Create filter," a new option labeled Custom condition traffic is now available.
This interface allows you to build multi-dimension rules. Instead of broadly blocking an entire country, you can now surgically drop traffic based on a combination of factors.
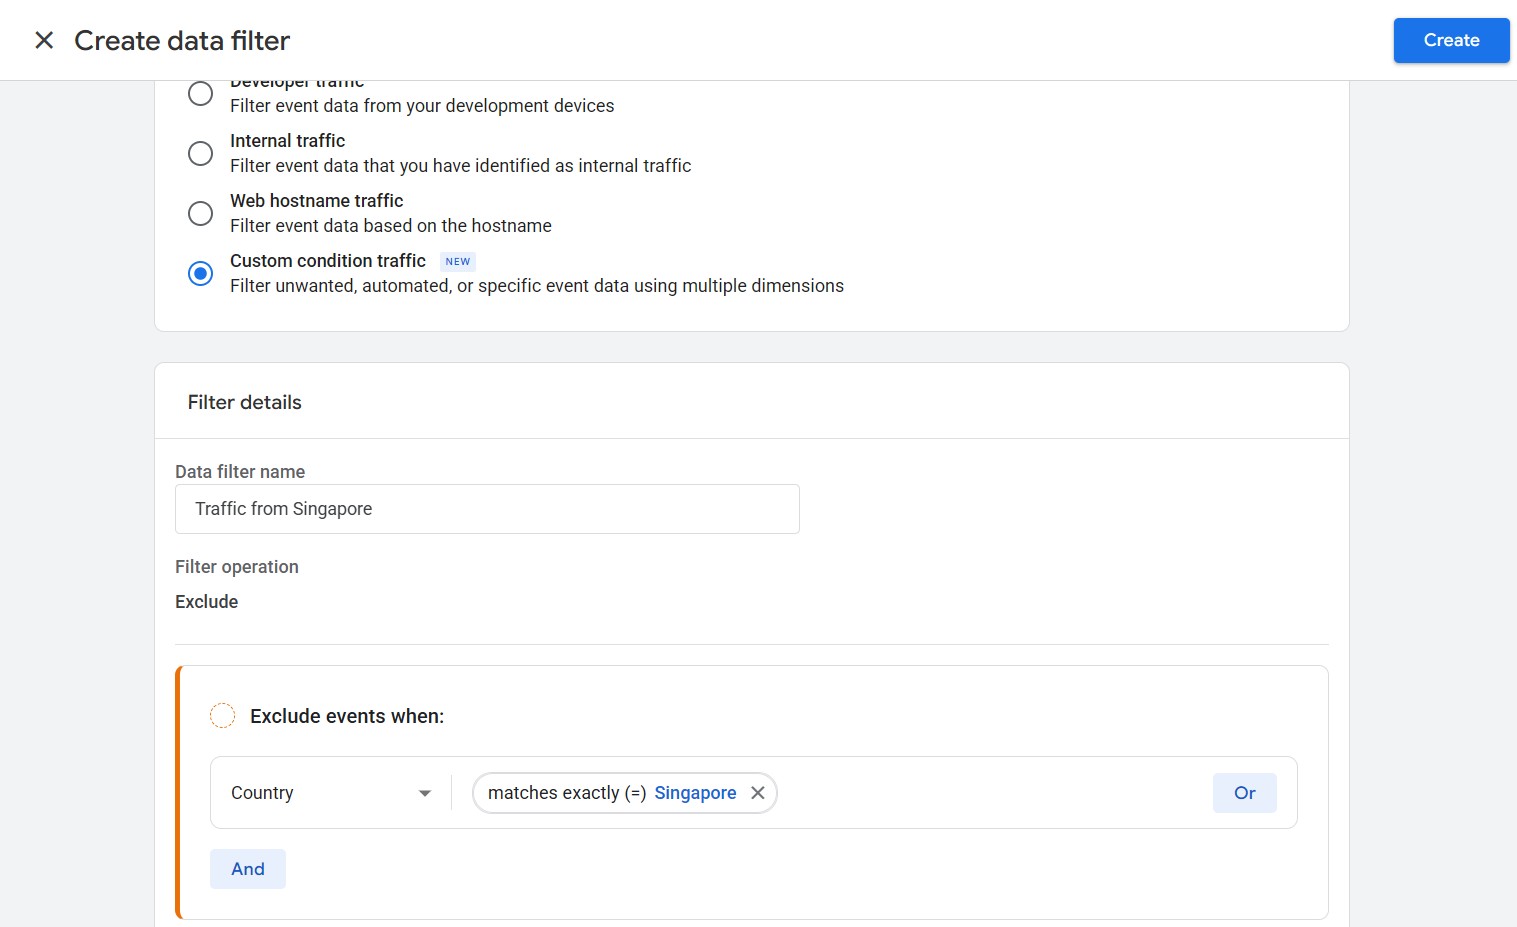
If you spot a bot attack, you can configure the filter to exclude events where the City is "Ashburn", AND the Browser version is exactly "119.0.0.0", AND the Device category is "Desktop."
Why This Beats Google Tag Manager Blocking
Many advanced analysts default to using Google Tag Manager to block unwanted traffic before it ever reaches GA4. However, the new GA4 Custom Condition filter possesses a major technical advantage over GTM: Server-side data enrichment.
Google Tag Manager runs client-side in the user's browser. It does not natively know a user's location, nor does it cleanly parse device information.
- GTM does not have built-in variables for
City,Country, orRegionbecause it cannot read IP addresses. - GTM does not have built-in variables for
Browser versionorDevice modelwithout relying on custom JavaScript to scrape the messy User-Agent string.
GA4, on the other hand, resolves all of this data on its backend servers after the hit is received. Therefore, if your bot attack originates from a specific city or relies on a spoofed device model, you cannot easily block it in GTM. You must use the new GA4 Custom Condition filter.
The Danger: Filtered Data is Permanently Destroyed
Before you start building exclusion rules, you must understand a critical difference between GA4 and Universal Analytics.
In Universal Analytics, every free-tier user could create up to 25 Views per property, allowing analysts to always keep an unfiltered "Raw" view as a backup.
Unlike Universal Analytics, standard GA4 does not have views. While enterprise GA4 360 customers can theoretically use paid Subproperties to isolate filtered data, the vast majority of companies on the free version of GA4 have no safety net.
Standard GA4 does not have a recycle bin.
When you set a Data Filter to "Active", the data that meets your criteria is destroyed at the processing level. It does not go to a hidden folder. It is gone forever. If you accidentally build your custom condition too broadly, you will permanently wipe out legitimate human traffic from your reports.
The BI Dashboard Alternative: Preserving Your Raw Data
Because GA4 permanently destroys filtered data, we ultimately recommend handling complex bot exclusion logic outside of the GA4 platform entirely.
If your organization uses Looker Studio, Power BI, or Tableau for business reporting, you should apply your exclusion filters directly to those dashboards instead of using the GA4 Admin panel.
The beauty of dashboard-level filtering is that you preserve your raw dataset. If you realize your filter was too aggressive and blocked real customers, you simply update the dashboard logic and your historical data instantly returns.
However, for marketing teams that do not have dedicated BI resources and rely heavily on the native GA4 UI for their day-to-day reporting, the Custom Condition filter is a necessary alternative. You just need to test it thoroughly.
The 4-Step Workflow for Safely Blocking Bots
Because the stakes are high, you cannot simply guess your filter parameters. You must follow a strict testing protocol.
Step 1: Identify the Footprint in Explorations
Never block a broad dimension like "Country" just because you see a spike in foreign traffic. You will catch real users in the crossfire.
Open a Freeform Exploration and break down your sudden traffic spike by multiple dimensions simultaneously. Look for the exact footprint. You are searching for a highly specific combination, such as a sudden surge of Linux users, on a specific outdated browser version, landing on a single irrelevant URL. Document that exact combination.
Step 2: Create the Filter in Testing Mode
Go to the Admin panel and build your Custom Condition filter using the exact dimensions you identified.
At the bottom of the configuration screen, ensure the Filter state is set to Testing. Never select Active on the first day. Save the filter.
Step 3: Monitor the "Test data filter name" Dimension
When a filter is in Testing mode, GA4 continues to process the bad traffic, but it quietly attaches a new dimension to those hits called "Test data filter name."
Wait one full week. Open your Standard Reports and add "Test data filter name" as a secondary dimension or comparison. This allows you to see exactly what data your new filter would have dropped. Check your purchase and conversion metrics. If legitimate conversions are showing up under your test filter name, your conditions are too broad.
Step 4: Set to Active
Once you have reviewed the testing data and verified that only the synthetic bot traffic is being flagged, you can safely return to the Admin panel and switch the filter state from Testing to Active.
Speed Up Your Bot Traffic Analysis
Isolating bot traffic in GA4 is tedious. The native Standard Reports limit your ability to cross-reference multiple dimensions quickly, forcing you to rely on the slow Explorations workspace just to find the bad data.
You can bypass this friction by installing the GA4 Optimizer Chrome extension.
Our extension brings Universal Analytics style filtering back to the GA4 Standard Reports. You can use the Advanced Table Filters feature to instantly slice your traffic by City, Browser, and Event Count directly in your standard tables. This allows you to identify bot footprints in seconds rather than minutes, so you can build your custom condition filters faster and get back to analyzing real human data.